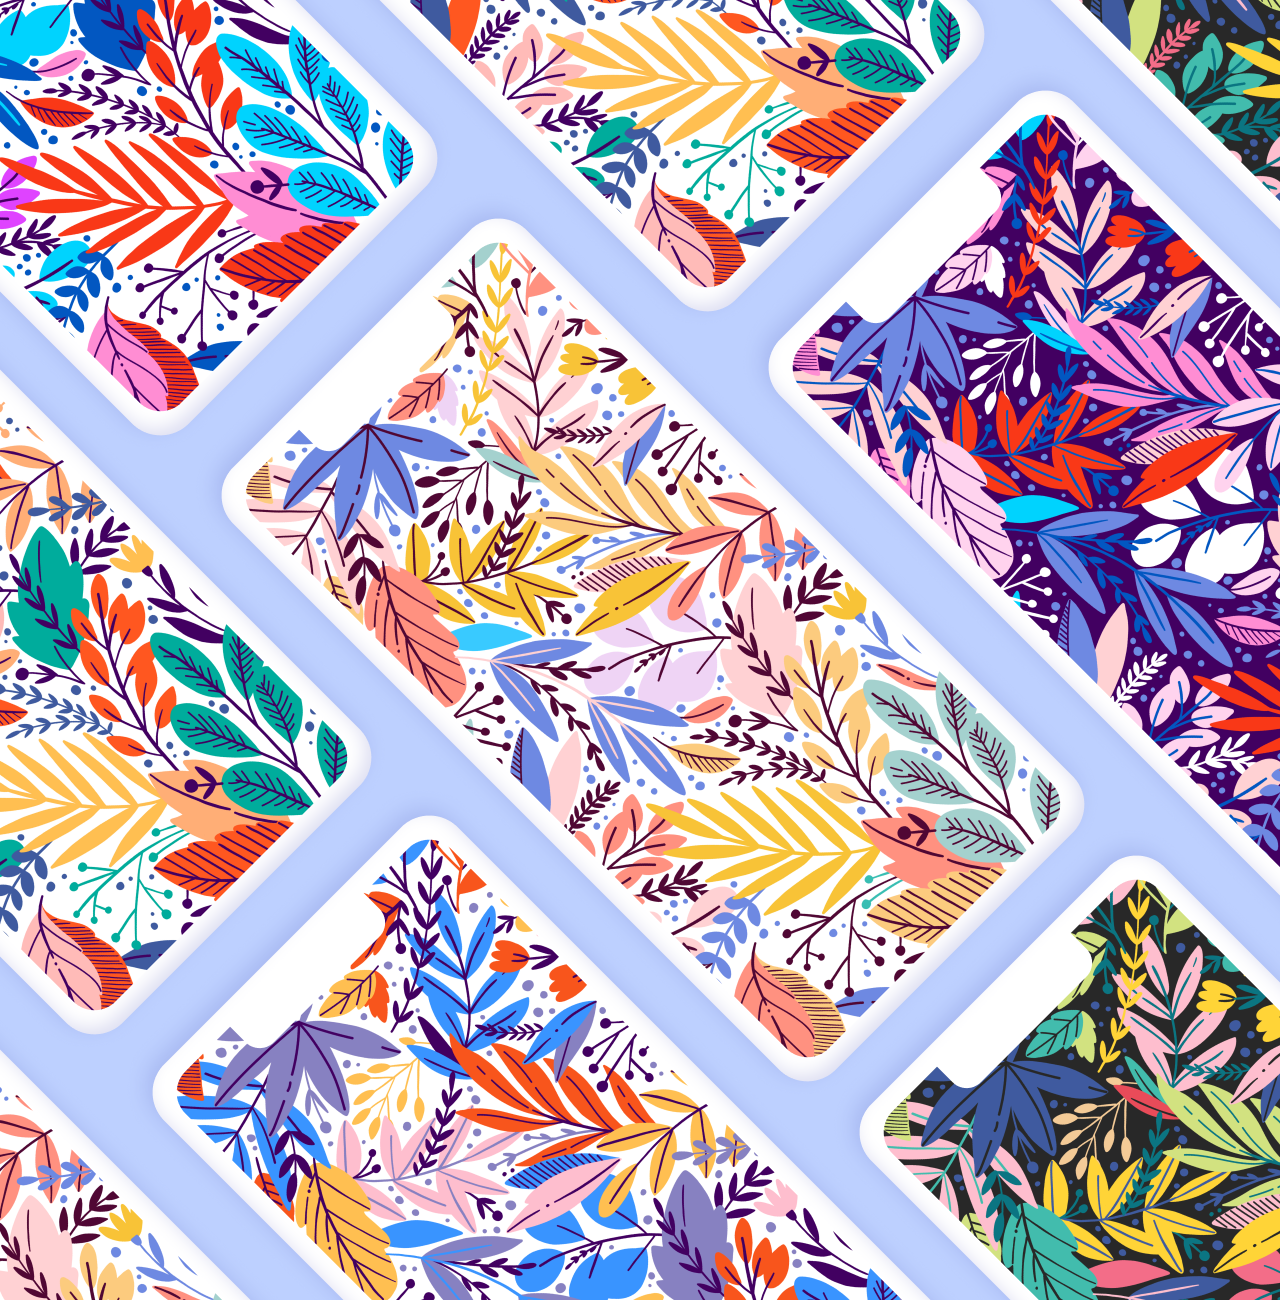
iPhone Mockup in Figma Tutorial.
With the following step-by-step guide, you will learn
how to create mockup in Figma.
Step 1 – Start with Frame.
Add new artboard with color what you like. For exemple:
- Fill: #E1E3F0

Step 2 – Creating Shell.
Draw simple shape with rounded corners:
- Width: 415
- Height: 852
- Corner Radius: 40px

Step 3 – Adding Drop Shadow Effect.
Add Drop Shadow to Rectangle:
- X: -6
- Y: -6
- Blur: 24
- Opacity: 16%
- Color: #373CAA
Step 4 – Adding Inner Shadow Effect.
Add inner shadow to rectangle with the following settings:
- X: -6
- Y: -6
- Blur: 24
- Opacity: 20%
- Color: #595DBD

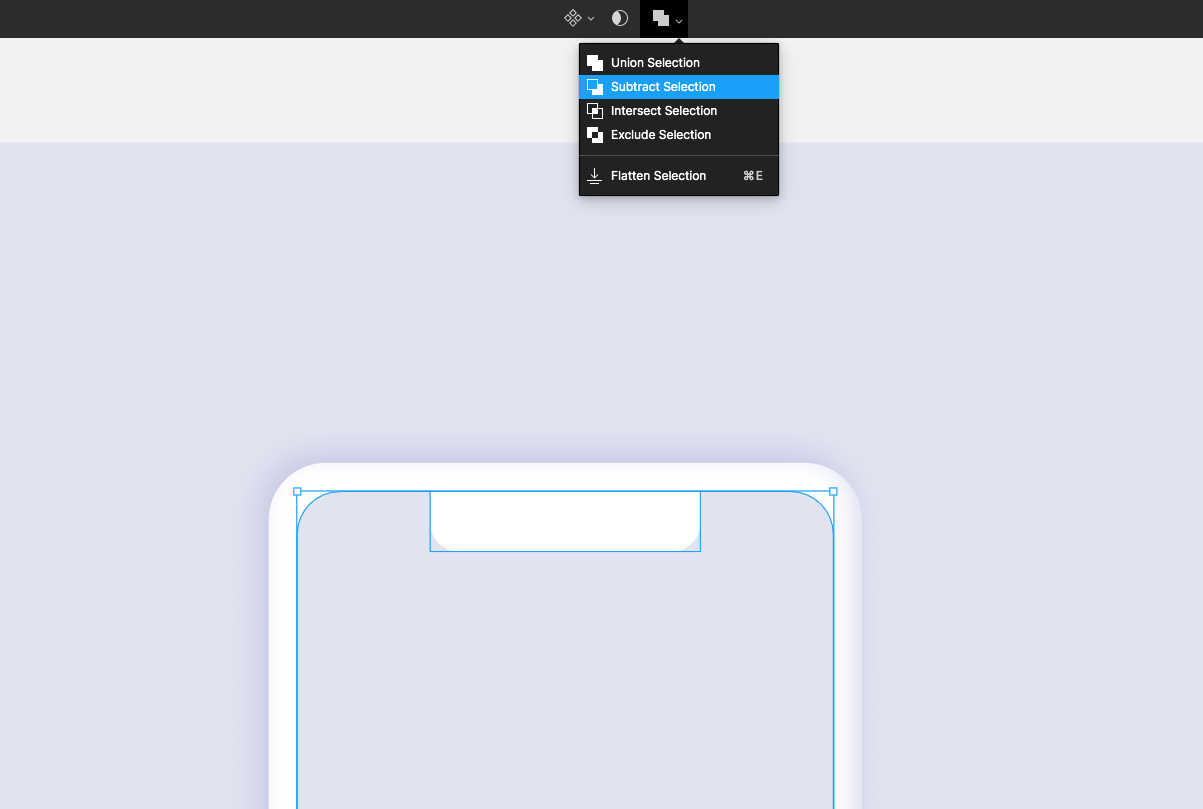
Step 5 – Adding Screen Rectangle with Unibrow.
a) – Dublicate first shape and paste upon rectangle with shadow:
Make it:
- Width: 375px
- Height: 812px
- Color: #595DBD
- Corner Radius: 30px

b) – Draw new rectangle for unibrow.
Make it:
- Width: 189px
- Height: 42px
- Corner Radius: 20px

c) – Make Subtract Selection with Second Rectangle.
Finally – Add Your Design.

?️ Ciao!
More From iMockups:
Top 5 iconic logos and their beautiful stories
Successful stories of world-known companies and how with the help of beautiful logos, they influence us.
Best graphic design 2020. Who won the Dezzen award?
The company made research and designed a series of topical stamps.